一. qrcode.js和jquery.qrcode.js(带logo)
1. HTML
<div class='qrcode-box' id='qrcodeBox'>
    <div class='title'>智慧城市</div>
    <div id='qrcode' class='qrcode'></div>
</div>
<div class='btn-box'>
    <button id='btn'>点击转为图片并下载</button>
</div>
2. JS
<script src="./js/jquery.js"></script>
<script src="./js/qrcode.js"></script>
<script src="./js/utf.js"></script>
<script src="./js/jquery.qrcode.js" ></script>
<script>
function makeCode(url) {
$("#qrcode").qrcode({
render: "canvas",
text: url,
width : "256", //二维码的宽度
height : "256", //二维码的高度
background : "#ffffff", //二维码的后景色
foreground : "#000000", //二维码的前景色
src: '../img/logo.png' //二维码中间的图片
});
}
function createQrcode() {
var url = ''; //链接地址
makeCode(url);
}
window.onload = function() {
createQrcode();
}
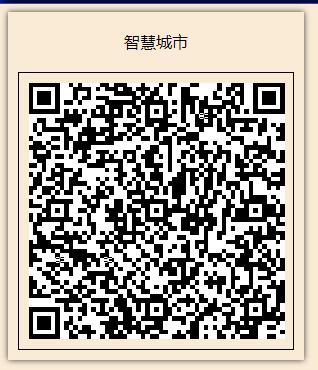
</script>3. 效果
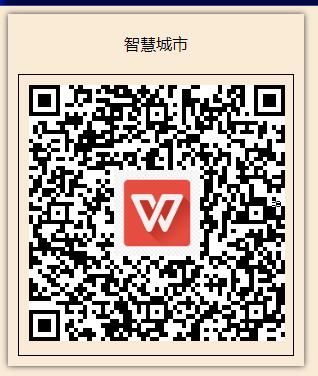
二. QRcode
1. JS
<script src="https://cdn.bootcdn.net/ajax/libs/qrcodejs/1.0.0/qrcode.min.js"></script>
<script>
// 设置参数方式
var qrcode = new QRCode('qrcode', {
    text: '', //链接地址
    width: 256,
    height: 256,
    colorDark : '#000000',
    colorLight : '#ffffff',
    correctLevel : QRCode.CorrectLevel.H
});
</script>
2. 效果
三. 将生成的二维码转图片保存
// 引入js
<script src="./js/bluebird.js"></script>
<script src="./js/html2canvas.min.js"></script>
<script>
// canvas生成图片
$("#btn").on("click", function() {
    var getPixelRatio = function(context) { // 获取设备的PixelRatio
        var backingStore = context.backingStorePixelRatio ||
	context.webkitBackingStorePixelRatio ||
	context.mozBackingStorePixelRatio ||
	context.msBackingStorePixelRatio ||
	context.oBackingStorePixelRatio ||
	context.backingStorePixelRatio || 0.5;
	return (window.devicePixelRatio || 0.5) / backingStore;
    };
    //生成的图片名称
    var imgName = "智慧城市.jpg";
    var shareContent = document.getElementById("qrcodeBox");
    var width = shareContent.offsetWidth;
    var height = shareContent.offsetHeight;
    var canvas = document.createElement("canvas");
    var context = canvas.getContext('2d');
    //将canvas的容器扩大PixelRatio倍,再将画布缩放,将图像放大PixelRatio倍。
    var scale = getPixelRatio(context);
    canvas.width = width * scale;
    canvas.height = height * scale;
    canvas.style.width = width + 'px';
    canvas.style.height = height + 'px';
    context.scale(scale, scale);

    var opts = {
	scale: scale,
	canvas: canvas,
	width: width,
	height: height,
	dpi: window.devicePixelRatio
    };
    html2canvas(shareContent, opts).then(function(canvas) {
	context.imageSmoothingEnabled = false;
	context.webkitImageSmoothingEnabled = false;
	context.msImageSmoothingEnabled = false;
	context.imageSmoothingEnabled = false;
	var dataUrl = canvas.toDataURL('image/jpeg', 1.0);
	dataURIToBlob(imgName, dataUrl, callback);
    });
});

// edited from https://developer.mozilla.org/en-US/docs/Web/API/HTMLCanvasElement/toBlob#Polyfill
var dataURIToBlob = function(imgName, dataURI, callback) {
    var binStr = atob(dataURI.split(',')[1]),
	len = binStr.length,
	arr = new Uint8Array(len);

    for (var i = 0; i < len; i++) {
	arr[i] = binStr.charCodeAt(i);
    }
    callback(imgName, new Blob([arr]));
}

var callback = function(imgName, blob) {
    var triggerDownload = $("<a>")
        .attr("href",URL.createObjectURL(blob))
        .attr("download", imgName).appendTo("body")
        .on("click", function() {
	    if (navigator.msSaveBlob) {
		return navigator.msSaveBlob(blob, imgName);
	    }
        });
    triggerDownload[0].click();
    triggerDownload.remove();
};
</script>注:代码GitHub地址:https://github.com/gaozhiming111/work_demo/tree/master/demo-001